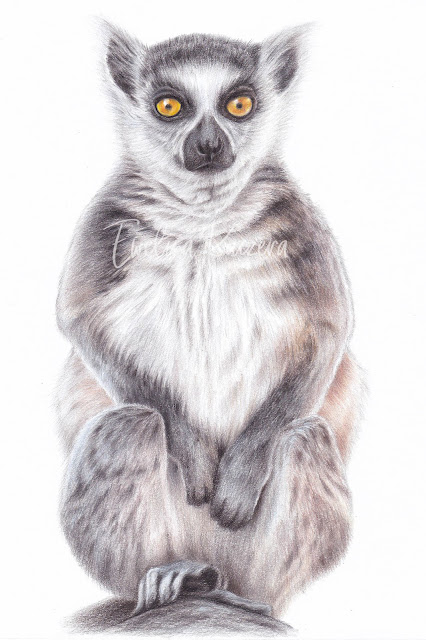
Hello in 2022! Today a tutorial I created in November - another Ring Tailed Lemur, a different pose but the same color shades used!
The steps are similar to the previous lemur tutorial so I'll not write too much about each step.
Polychromos colors used:

Luminance colors used:

Paper: no-name bristol board, size A4 (you can use bigger sizes as well)
Photo reference: pixabay
Step 1

Creating the sketch. Dark sepia or dark grey pencils recommended. Masure the animal's head and as shown in the attached scan and see how many times it will fit the whole animal's height.
Step 2

Let's start with the darkest parts of the fur on the head, on the ear and around the eye - as shown on the picture. Start from the left side if you're right-handed (so that you can avoid smudging the whole drawing).
Step 3

Use yellow tones to draw the eyes. Create light grey half-tones of the fur and finish the darkest parts with black pencil.
Step 4

We are starting working on the body. Let's create fur layers with light greys, browns and dark grey pencils.
Step 5

Let's draw the paws using browns and light greys.
Step 6

More fur layers! Mark dark parts with sepia or similar tone; draw them with short pencil strokes.
Finish paws with black pencil.
Finish paws with black pencil.
Step 7

In this step we are adding a stone on which the lemur sits and slowly finishing the drawing.
The last paw is created in the same way as in the previous step. Draw the darker places with short pencil strokes.
The last paw is created in the same way as in the previous step. Draw the darker places with short pencil strokes.
Step 8

Let's finish the fur on the paw. You can use rubber / a pencil rubber to add more light on the fur here and there. Our lemur is finished!
* It is forbidden to copy this article (and drawings included in it) without the author's permission.
* It is forbidden to copy this article (and drawings included in it) without the author's permission.