12/17/2021

How to draw a Ring Tailed Lemur with colored pencils - a step by step tutorial

How to draw a Ring Tailed Lemur with colored pencils - a step by step tutorial


Recently I have drawn two portraits showing lemurs so I thought it is a good idea to scan them step-by-step and that resulted in two tutorials - here is the first one!

12/02/2021

Talens Art Creation Sketchbook - review

Talens Art Creation Sketchbook - review

Hello in December! Christmas is coming ๐ŸŽ… Today a review of super cute mini hardback sketchbooks in pastel colors which I bought this year. I'd like to share my opinion on them.

3/25/2021

How to draw an apple with colored pencils - step by step tutorial

How to draw an apple with colored pencils - step by step tutorial

Red apple drawing

A colored pencil step-by-step showing a red apple, ideal for beginners, using just seven shades. This tutorial was drawn with Koh-I-Noor Progresso pencils, but if you don't have them, use pencils you have - just compare the colors and choose similar :)


Progresso colors used:

3 Titanium White
10 Carmine Red
11 Natural Siena
12 Ivory Black
16 Bordeaux Red
23 Dark Brown
170 Pyrrole Red

Optionally:

Derwent Drawing Chinese White, kneadable eraser

Colors used and photo of Progresso pencils

Paper:

Strathmore Toned Gray, I used size approx. 8 x 10 cm (3 x 4 in) - you can use something a bit bigger if you want

Reference photo:

pixabay

So let's start!

1. The outlines - I did them with Carmine Red, Bordeaux Red and Dark Brown.

Look at the step 1 scan and draw carefully a rounded shape of an apple. Don't press the lead too hard to the surface so that you can easily erase eventual mistakes.


Step 1: outlines

2. Mark shades - with Dark Brown and Bordeaux Red on the apple.

Give them a smudgy look as in the attached drawing.


Step 2: adding base color

3. Add more shades - darkening our apple with Ivory Black and Dark Brown.

The bottom of the apple is in the shadow so it should be the darkest part.


Step 3: darkening base colors

4. Use Pyrrole Red to mark lighter parts of the fruit.

Leave some spaces uncovered - we will add there some white color later.


Step 4: adding bright red layer

5. Now take white pencil and draw the shiny parts.

Add some white here and there over previosuly created dark layers so that our apple will be more diverse in colors and with that more interesting.


Step 5: adding the shiny parts with white pencil

6. The last step - adding sme shadow under the apple and a bit of white to lighten the background.

The drawing is finished :)


Step 6: adding shadow and a bit of background


* It is forbidden to copy this material (and images included in it) without the author's permission.

Koh-I-Noor Progresso - review - a set of 24 woodless colored pencils

Koh-I-Noor Progresso - review - a set of 24 woodless colored pencils


It's time to post another colored pencil review. This time a set of 24 Progresso Woodless colored pencils produced by Koh-I-Noor from Czech Republic.

The brand is very popular in Poland. Back in my schooldays, I remember my friend had a set of 12 Progresso and to me these pencils looked so original - no wood, only the lead! How unique! ๐Ÿ˜Š


I like the design of Progresso. Their wide lead (approx. 7.6 mm diameter) which has a colorless cover, can be used to cover larger areas, you can also sharpen it to a fine point and draw details.
Each pencil has a number and a color name written as well as lightfastness level. When it comes to the softness, I would compare them to Koh-I-Noor Polycolor (you can use this series as complementary pencils).

Progresso pencils are available as sets of 12 and 24. In some shops they are available as open stock.


The trick you can do with Progresso - you can sharpen them and smudge on the paper:


The important things is that you shouldn't press Progresso hard to the surface as they can break in half! The intensive color can be applied easily so there is no need to press them. Also be careful when you leave them on the table, due to their rounded shape they can easily fall down.

Progresso pencils mix well on paper. I really enjoy drawing with them. Although if you are a fan of applying many layers, this product may not be suitable for you - after a couple of layers there is this waxy surface that doesn't want to accept more layers.

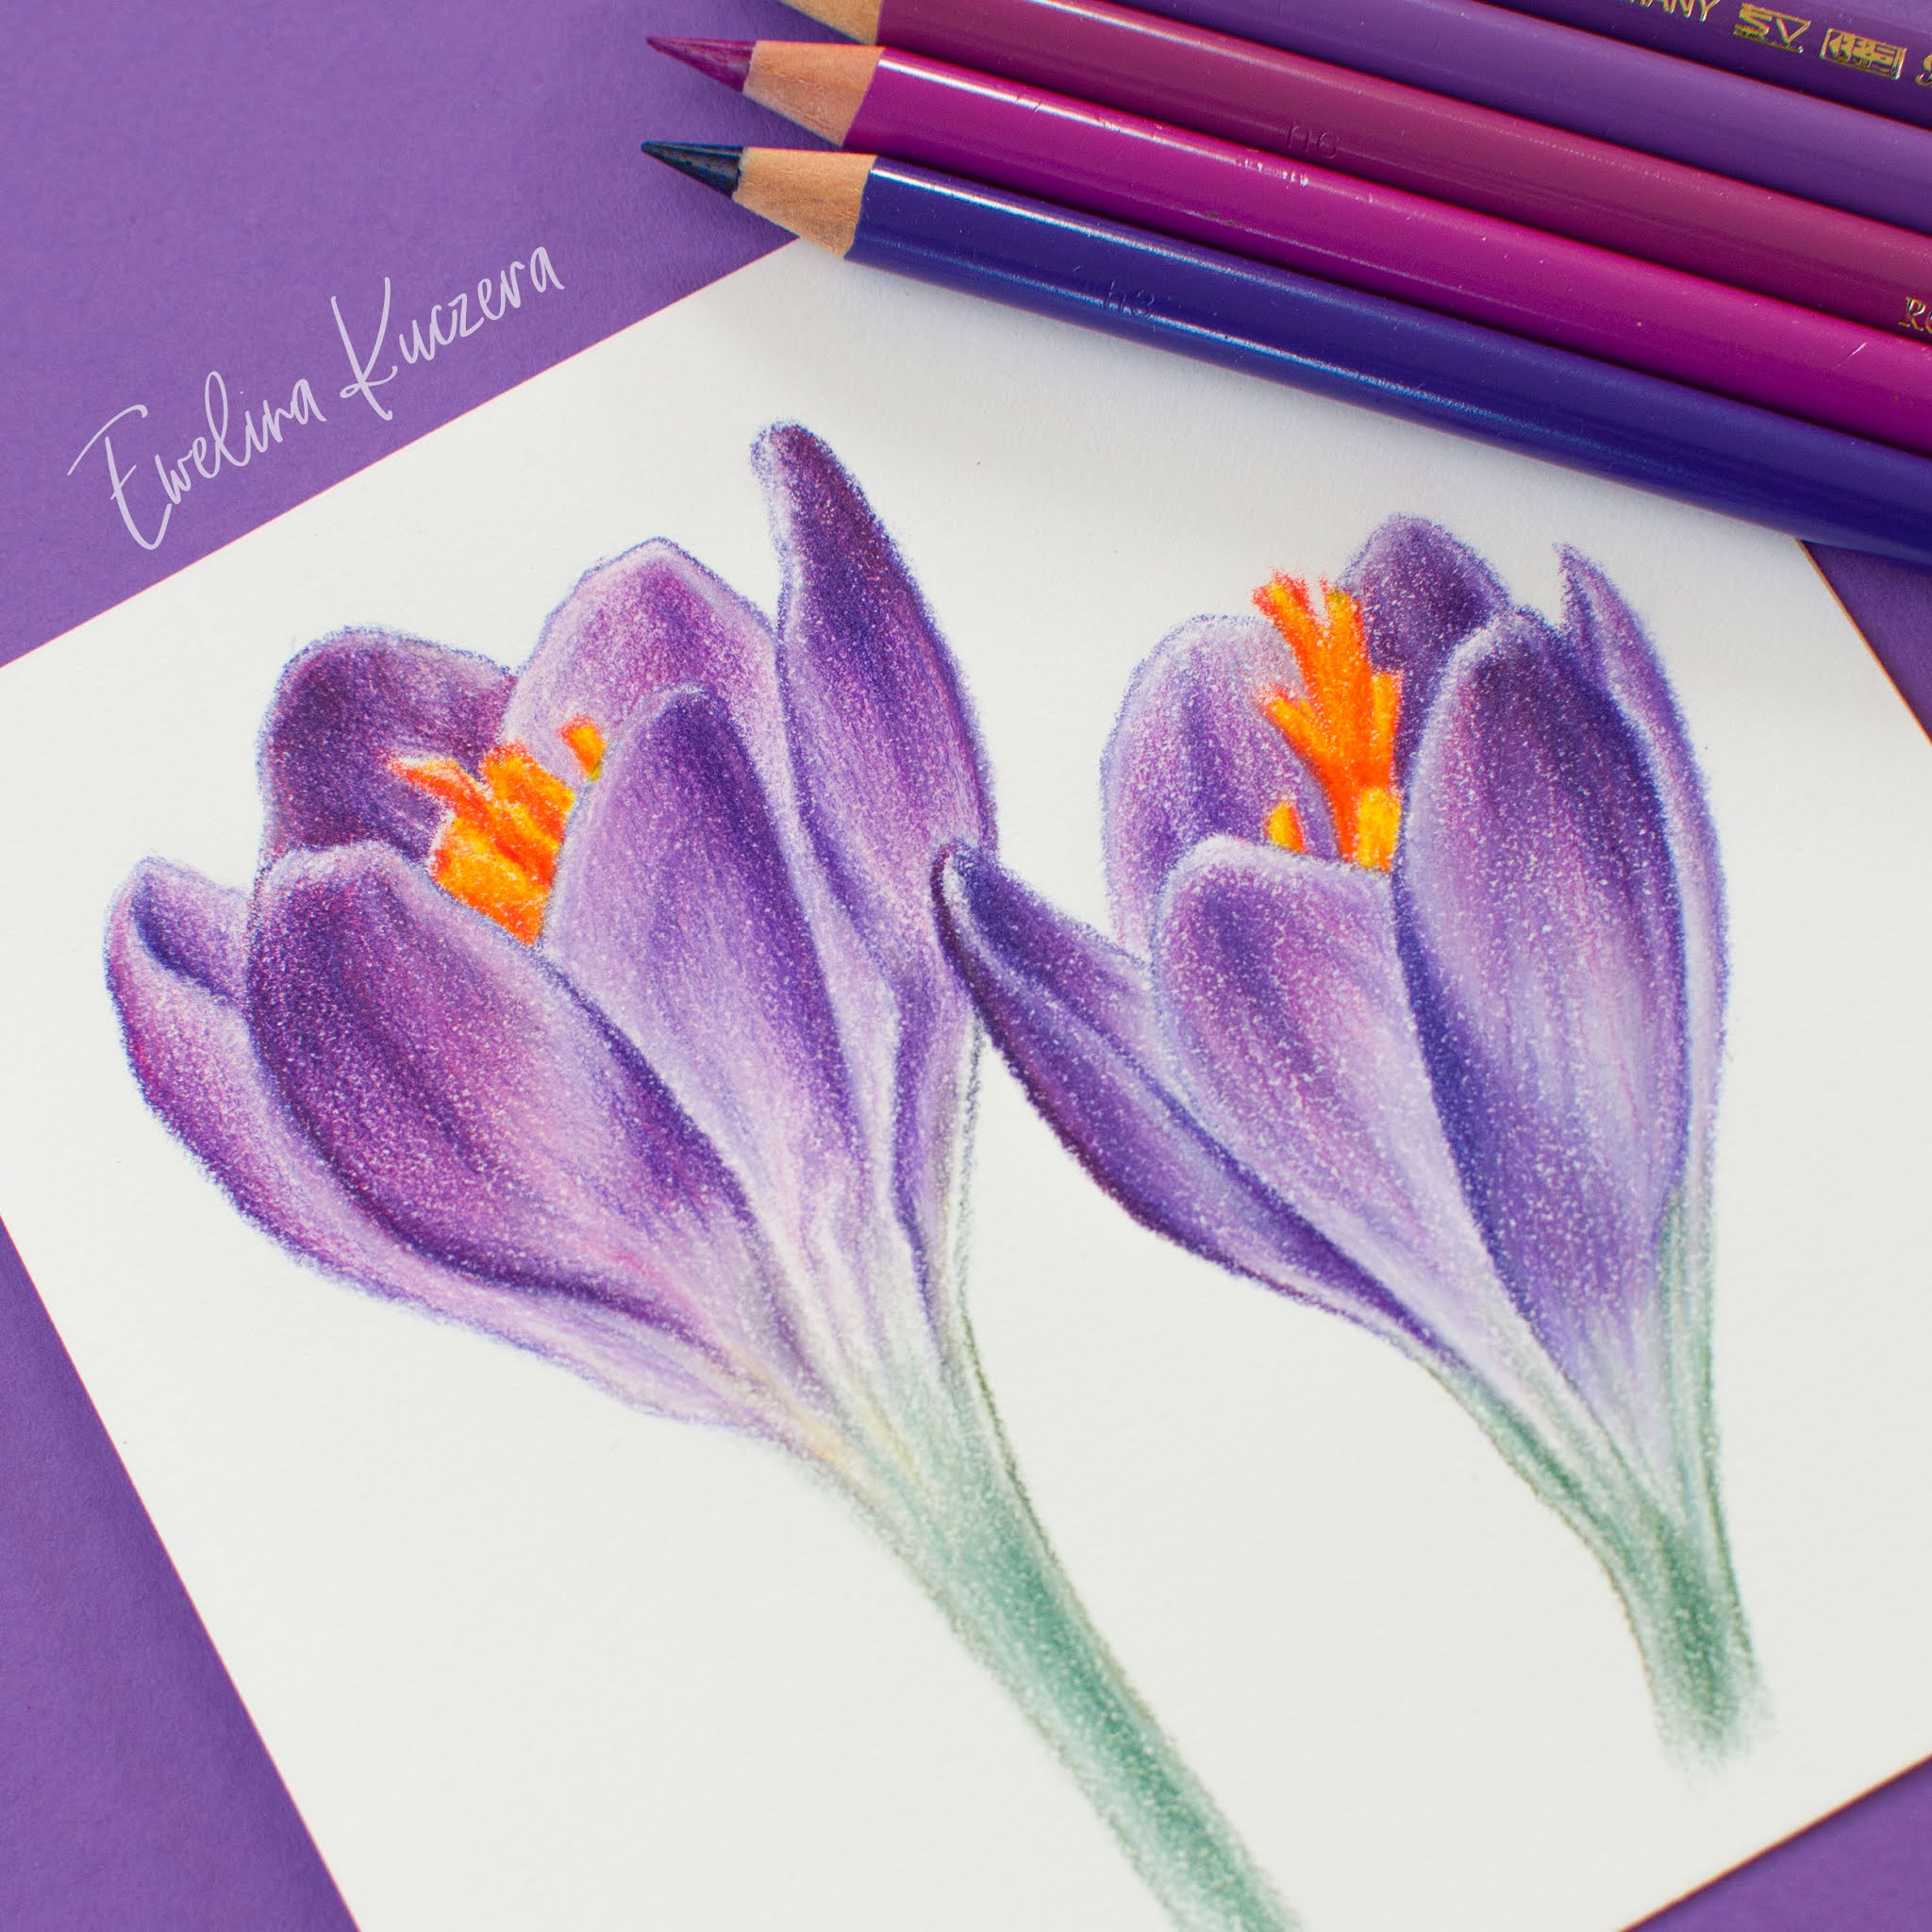
Here are examples of my artworks created with Progresso so that you can see what effects can be achieved by using tinted paper. I like this product and I know I will draw more artworks in the future using my Progresso set!


To sum up:

Pros:
✅ good price
✅ good for beginners
✅ nice and original design
✅ rich colors that look great on tinted paper, especially on Strathmore Toned Gray ๐Ÿงก
✅ they are woodless so you can use up all lead
✅ you can quickly cover larger surface as well as sharpen them to a fine point and draw details

Cons:
❌ after a couple of layers a waxy surface is created and it is hard to apply more and more color
❌ fragile - the lead may break in half
❌ only 24 colors - maybe this is beacuse this is a product rather for scoolchildren / colored pencil beginner artists than professionals
❌ only pure lead so they are heavier than other pencils - to me it is tiring to my hand after a longer coloring
❌white color is disappointing, need to use more intensive white pencil from other brand


* It is forbidden to copy this material (and images included in it) without the author's permission.

3/24/2021

How to draw a pear with colored pencils - Step by step tutorial

How to draw a pear with colored pencils - Step by step tutorial


Today I'd like to share a colored pencil step-by-step showing a green pear. In seven steps I'll show you how to draw this fruit using Koh-I-Noor Progresso pencils, but if you don't have them, use pencils you have - just compare the colors and choose similar :)


Progresso colors used:

1 Chrome Yellow
3 Titanium White
4 Meadow Green
5 Dark Green
11 Natural Siena
12 Ivory Black
13 Dark Yellow
19 Yellowish Green
21 Light Ochre
23 Dark Brown
24 Platine Grey

Paper:

Canson Mi-Teintes, size approx. A5
(I don't remember the exact color name, but generally this paper series is great, so you can choose a similar grey tone, or other brand's sheet)

Reference photo:

pixabay

So let's start!

1. The outlines - I did them with Dark Green and Dark Brown.

Look at the attached scan and draw a rounded shape of a pear. Don't press the lead too hard to the surface so that you can easily erase eventual mistakes.


2. Marking dark shades and spots on the fruit - with Dark Brown, Ivory Black and Natural Siena.

You can press the lead to the paper in places like the bottom of the pear which will be darker.


3. Adding Dark Green - in this step let's mark our shadows.

Create a layer that is darker on the right side and the bottom of the fruit, add some delicate layer on the right which will be much lighter.


4. Take Meadow Green and apply a new layer over the whole fruit as shown below.


5. Do the same as in step before but this time using Yellowish Green and Dark Yellow.


6. Now it's time to add a new layer with Chrome Yellow.

Take Dark Brown and Ivory Black pencils and darken the shades and the spots. You can add some white as a blender on a fragment where the fruit is the most lighted.


7. The last step - creating a delicate shadow on the right and adding some white on the background.

The pear drawing is ready ๐Ÿ˜‰๐Ÿ


* I hope you learned something from this small tutorial. If you have questions - ask in the comments!

* It is forbidden to copy this material (and images included in it) without the author's permission.

3/19/2021

How to draw flowers with colored pencils - a step by step tutorial

How to draw flowers with colored pencils - a step by step tutorial

Spring is coming so I decided to draw these beautiful violet crocus flowers and create a tutorial, so take some paper, sharp your pencils and draw these flowers step by step!


3/03/2021

Derwent Drawing colored pencils - Review

Derwent Drawing colored pencils - Review


This time I will review unique Derwent Drawing pencils and show some examples of my works which were created using them ๐Ÿ˜‰