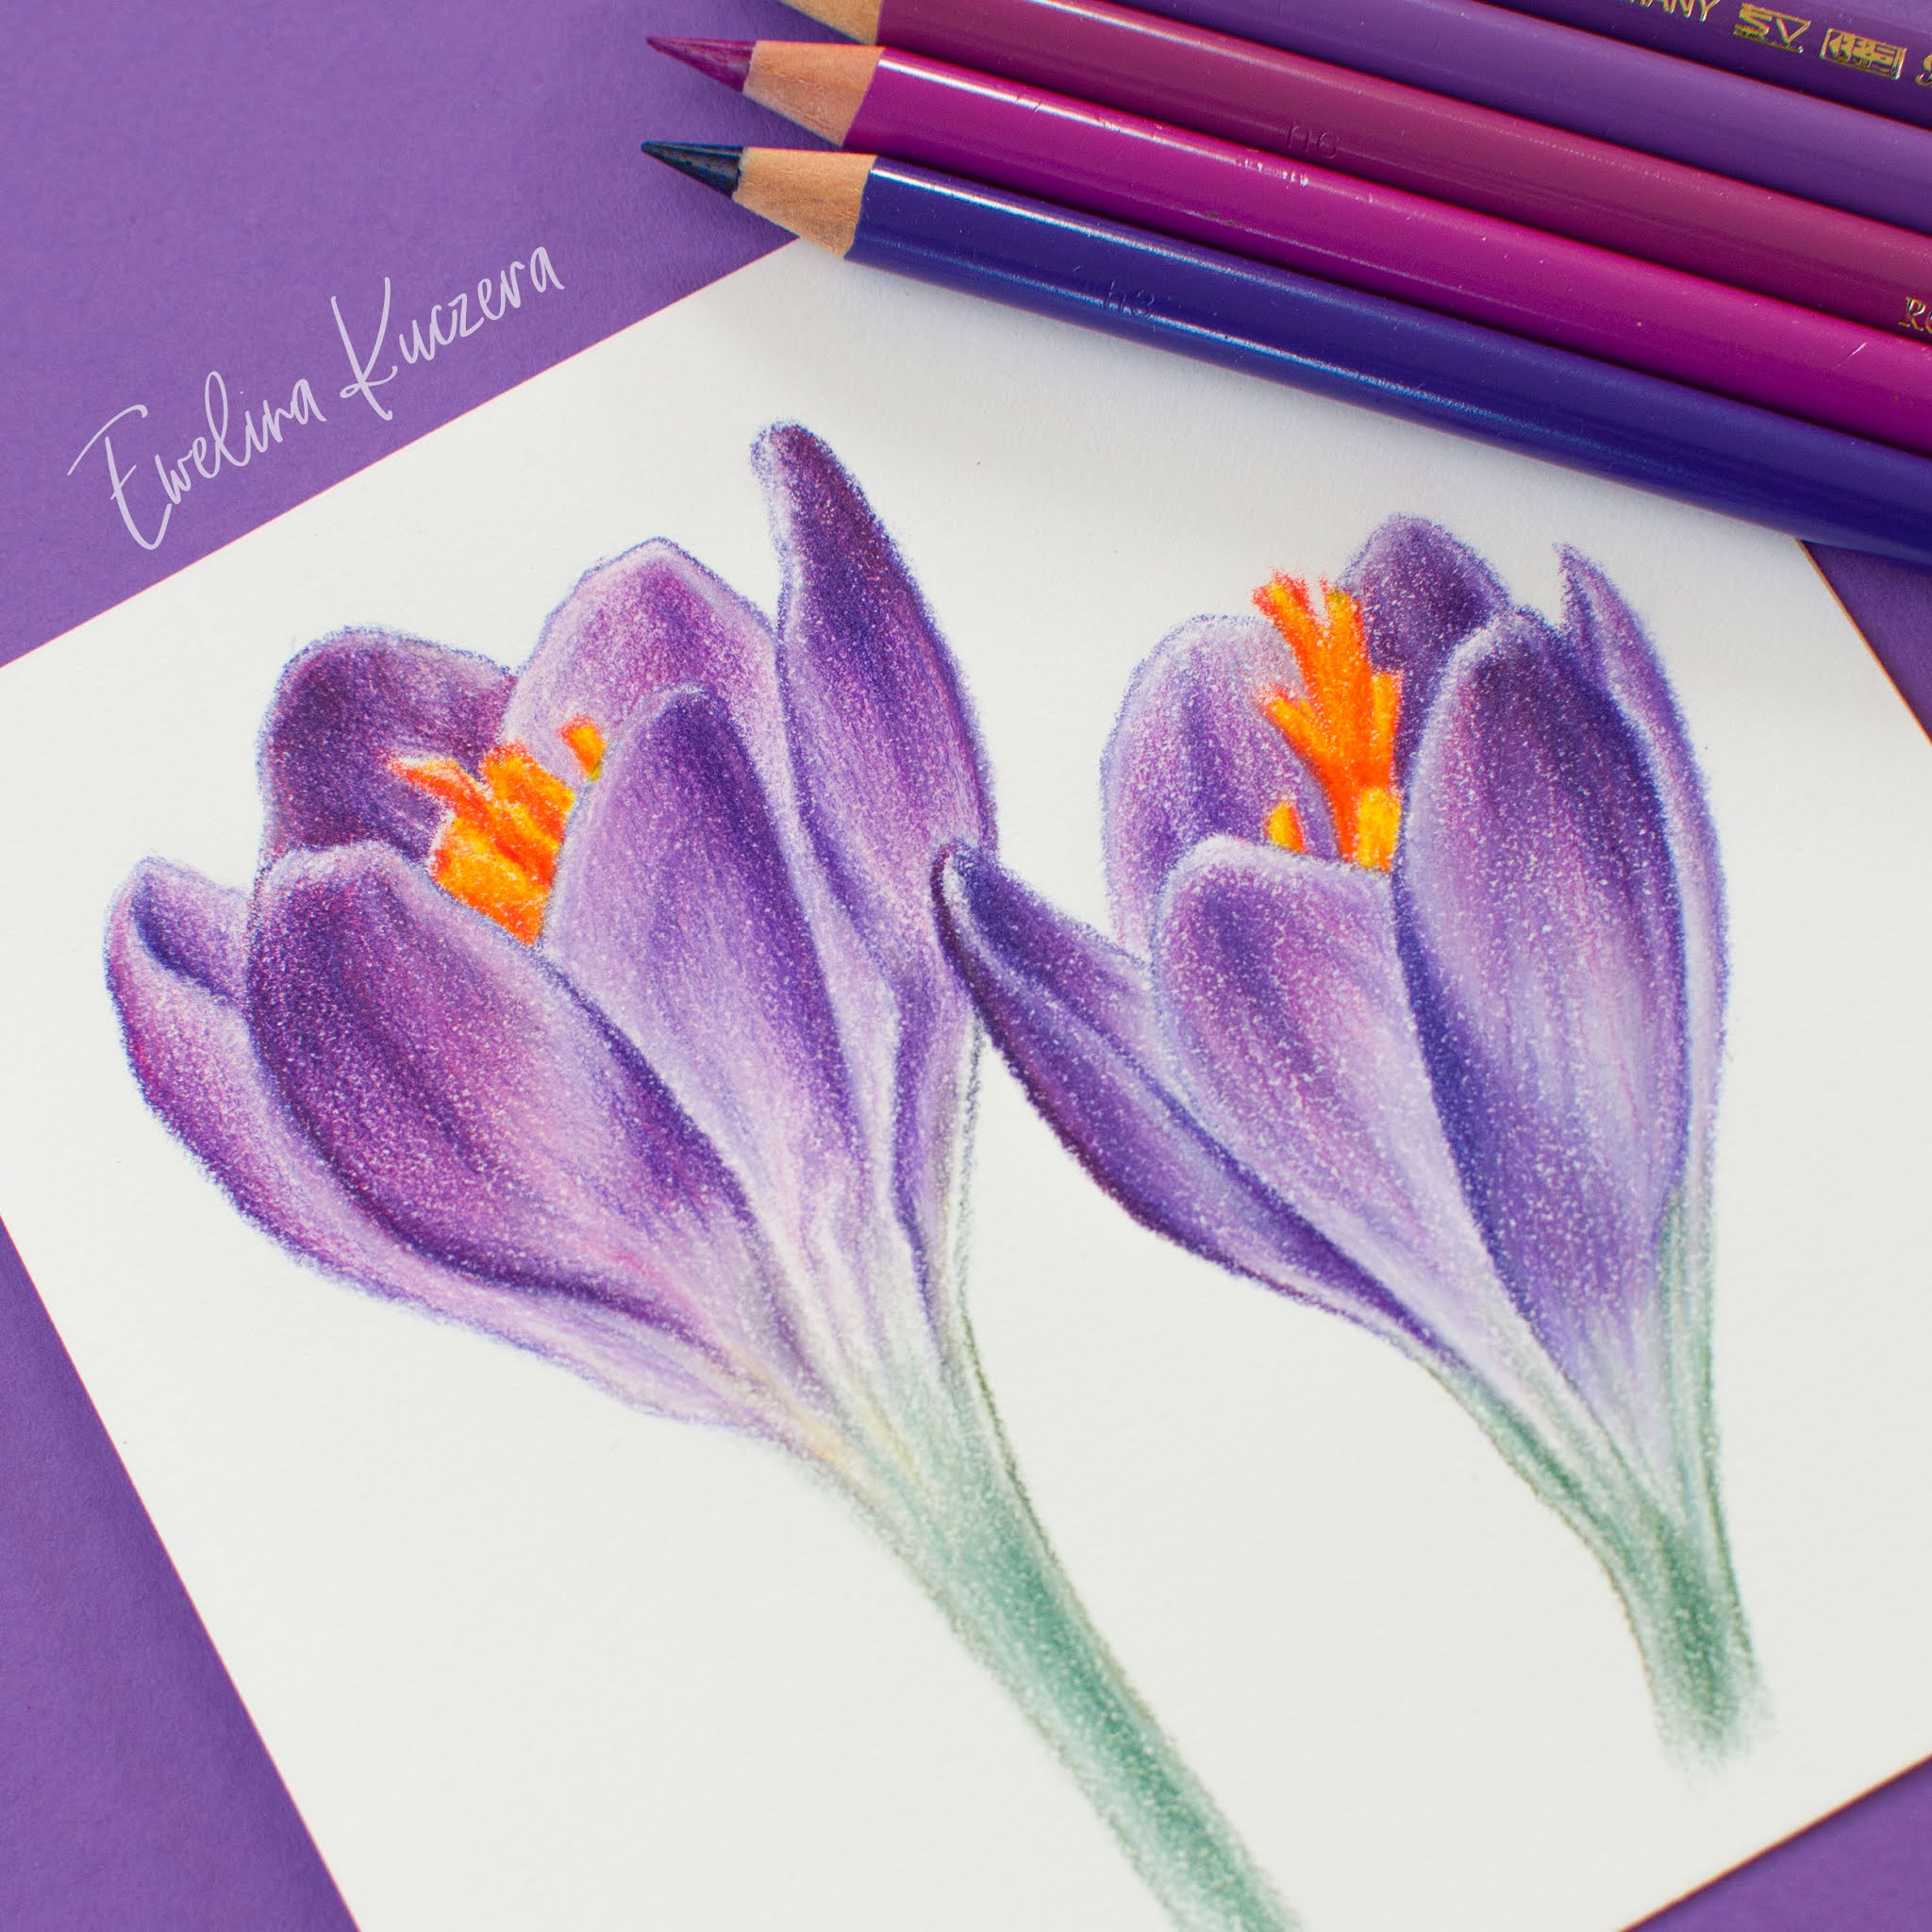
Spring is coming so I decided to draw these beautiful violet crocus flowers and create a tutorial, so take some paper, sharp your pencils and draw these flowers step by step!
The reference photo comes from pixabay website:

Originally I used Polychromos and Luminance pencils but if you don't have any of these, try to draw with brands you have. I attached a color chart so that you can compare the shades with what you have:

List of materials:
Paper used:
Stonehenge Lightweight 135 gsm, 100% cotton; size more or less 5.5 x 5.5 inches
This paper has a slight texture - maybe not visible but you feel this when drawing, somethimes it is hard to get fine details because of that.
Polychromos used:
- Purple & pink: 123, 125, 128, 133, 134, 135, 136, 137, 138, 160, 249
- Green: 165, 168, 172, 174, 230, 278
- Orange & yellow: 107, 108, 113, 117, 118
Luminance: |
802, 093
Other:
- kneadable eraser may be useful
- white pencil to use as a blender (I used Derwent Drawing here)
The pinks were used sporadically. Colors like 137, 249, 136, 135, 172, 174 were most used to create this drawing.
So let's start creating!
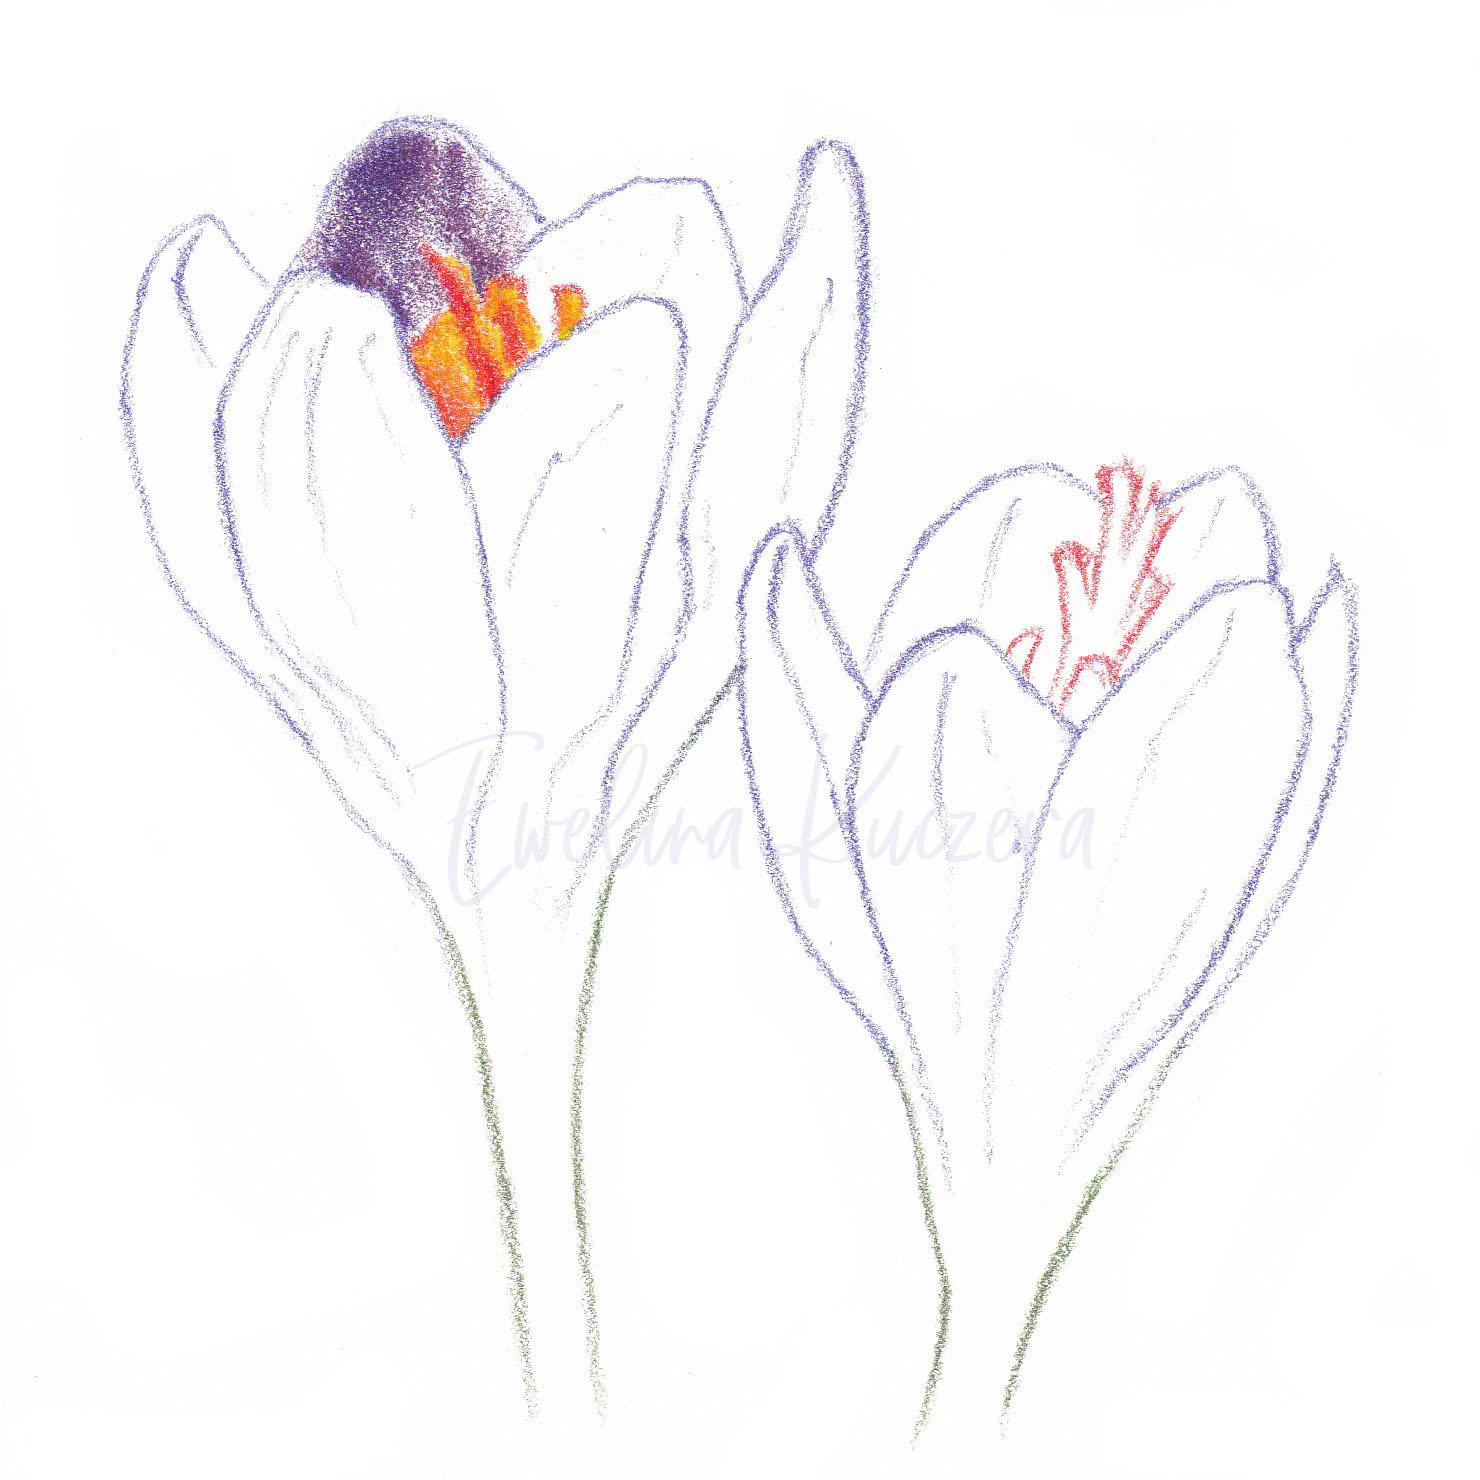
1. The outlines - I suggest starting with the flower on the left if you're right-handed.
Here I used 137 color for petals. Try to draw them creating soft, curvy lines, just look how the crocus is shaped in a photo. Use dark orange (117) to mark the stamen. With 174 outline the stem.

2. Let's start with the first petal - I marked the darkest shades first with dark violets and magenta (133).
Then I colored the petal with light violets. The next step is to mark darker parts of the stamen (117,118). Then use lighter shades of orange and in the end, color the stamen with yellow.
3. Add some color to the second petal - here the steps are analogical to the previous, just mark the darkest parts with dark purples and magenta.
Cover the whole petal with lighter shades of violet, gently pressing the lead to the paper. You can add some light pink layer so that the petal gets some pinkish look. Now take the white pencil and create a new layer which will blend shades and make the petal look lighter. You can press the white lead lighter or harder to the surface, thanks to that the petal will have more hue differences and will look more natural. Using the same method, start shading the front petal.

4. More progress - as you can see, here I used more pinks than previously.
In the part where the petal meets the stem, you can add some darker green or greyish green.

5. Adding the back petal - using violets, some magenta and white as a blender.
Start working on the second front petal as shown in the tutorial.

6. Finishing the flower part - time to draw the last petal!
You already know the method from the previous steps 😉 use some yellow where the stem starts.

7. Using greens to draw the stem - first, I used darker colors of green, then I covered the whole stem using a beautiful 172 shade.
In the end I added white Derwent Drawing. I strted working on the second crocus, using oranges and yellow to draw what's inside the flower.

8. More violets & purples - drawing the left and back petals.

9. Adding more petals - mark the darker shade on the front petal.
Color the stem using the same greens as in the step 7.

10. Working on the front petal - this is the part the closest to us, who observe the flower.
Add more details, you can add various tones (pinkish, magenta). Add white layer.

11. Final touches - the last small petal.
Adding darker violet where you need, removing the smudges on the paper with kneadable eraser if necessary. The flowers are finished! 💜💜💜

* It is forbidden to copy this material (and images included in it) without the author's permission.