Recently I have drawn two portraits showing lemurs so I thought it is a good idea to scan them step-by-step and that resulted in two tutorials - here is the first one!
I used Polychromos and Luminance but of course you can use another brands' pencils.
Polychromos colors used:

Luminance colors used:

Paper: no-name bristol board, size A4 (you can use bigger sizes as well)
Photo reference: Shutterstock
Step 1
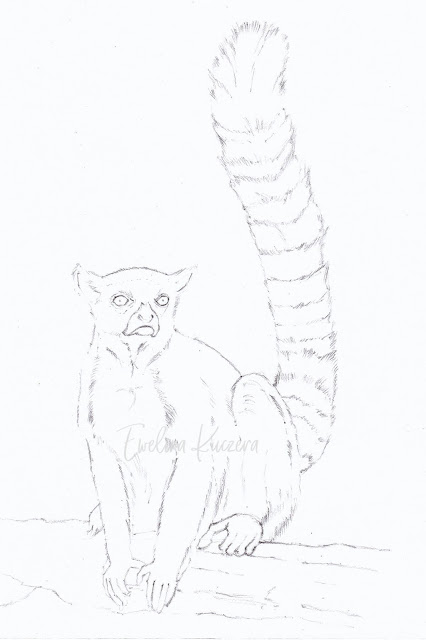
Let's start with an outline - here you can use Sepia or dark grey pencil. The animal's head is placed more or less in the middle of a paper sheet, be careful about the proportions - the tail is quite long and we want it all to be placed on the drawing. Our lemur sits on a thick branch, let's mark its shape.
Step 2
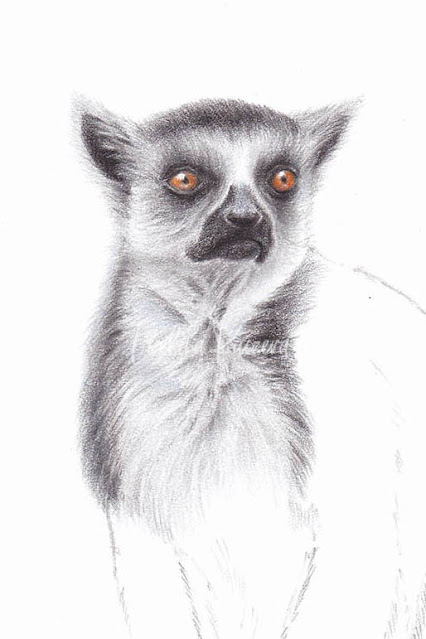
We're starting creating layers! Let's start with the yellowish eyes. Use some brown shades to mark darker parts.
Take black color and draw the nose, ears and other darker places visible on the attached scan. Use dark and light grey pencils to create half tones on the fur.
Take black color and draw the nose, ears and other darker places visible on the attached scan. Use dark and light grey pencils to create half tones on the fur.
Step 3
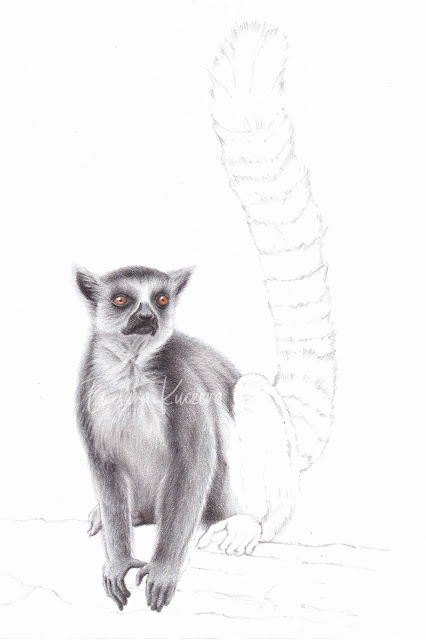
We're working on the body of the lemur - use dark cold grey tones. Shade the fur so that it looks more realistic. You can take light brown / pink Luminance pencil to use it on the back of the animal - it will vary the colors slighly, the fur in this place will look warmer.
Step 4
Let's finish the body like in the step before - use warmer shades here and there so that the fur won't look so monotonous.
In this step we'll work on the branch - draw details like in the scan, then shade it using dark brown and then light brown colors. I started doing it from the left side (I'm right-handed, so I avoid smudging the drawings while working on them).
Step 5

In this step let's finish the branch. Use some rubber to make it shiny here and there.
Step 6
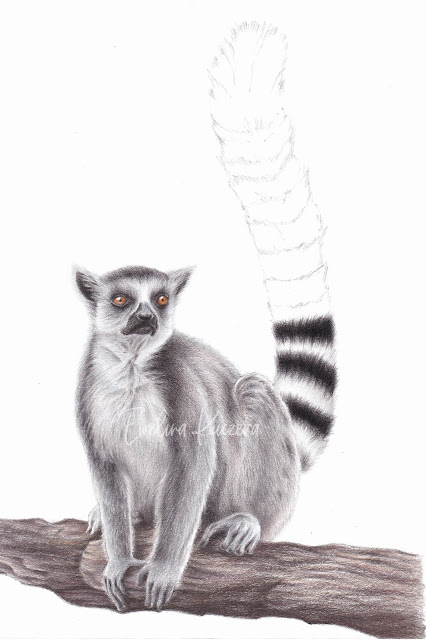
Now the best part for me - drawing the characteristic black and white tail! 🤍🖤🤍🖤
We'll use here a lot of black and light grey pencils. Start as shown on the picture.
Step 7

The tail - work in progress. Black and ligt grey rings by turns. Have fun 😉
Step 8
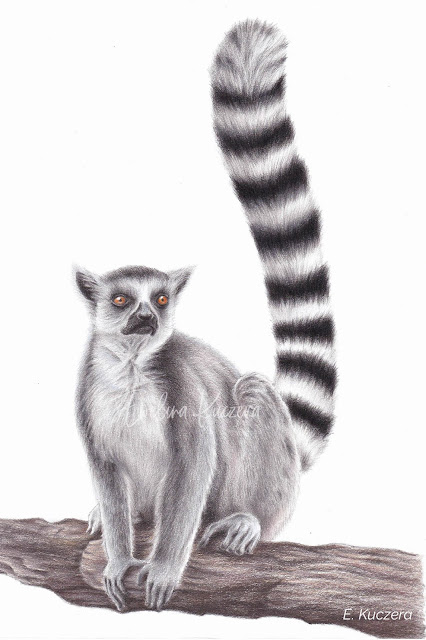
The last step - creating the last rings of the tail! And our lemur is ready. Share your drawings in the comment section💜🎨
* It is forbidden to copy this article (and drawings included in it) without the author's permission.